Remote control via IM
📌 AutoClaw currently supports five IM channels: Telegram, WhatsApp, Discord, Slack, and Lark. Once connected, you can chat directly with a specific Agent on these platforms. This article uses Telegram and Lark as examples for account setup.
What you will learn:
- Find the IM channel setup entry
- Connect each platform using a Bot Token, a QR code, or an App ID / App Secret
- Check the connection and handle routine maintenance
1. What is an IM channel
IM channels connect AutoClaw Agents to the instant messaging tools you already use. Once connected, you can chat directly with a specific Agent on that platform.
Each bot responds as one Agent. To have different bots handle different work, add more bots to the same channel (currently Lark supports multiple bots) and choose a different Agent for each.
2. Supported platforms
Platform | Connection method | Description |
|---|---|---|
Telegram | Bot Token | Create a bot with @BotFather in Telegram and get its Token. For group chats, turn off Group Privacy Mode for the bot. |
Scan a QR code to log in | No credentials needed. After you save, a QR code appears; scan it with WhatsApp to link the account. | |
Discord | Bot Token | Enable Message Content Intent for the bot in the Discord Developer Portal and invite the bot to a server. |
Slack | Bot Token and App-Level Token | Create a Slack App in your workspace and copy both tokens. Your workspace may require administrator approval. |
Lark | Scan a QR code, or use App ID / App Secret | Connects over a persistent connection, so no public address is needed. Supports multiple bots. |
3. Open IM channels
- Open the AutoClaw desktop app.
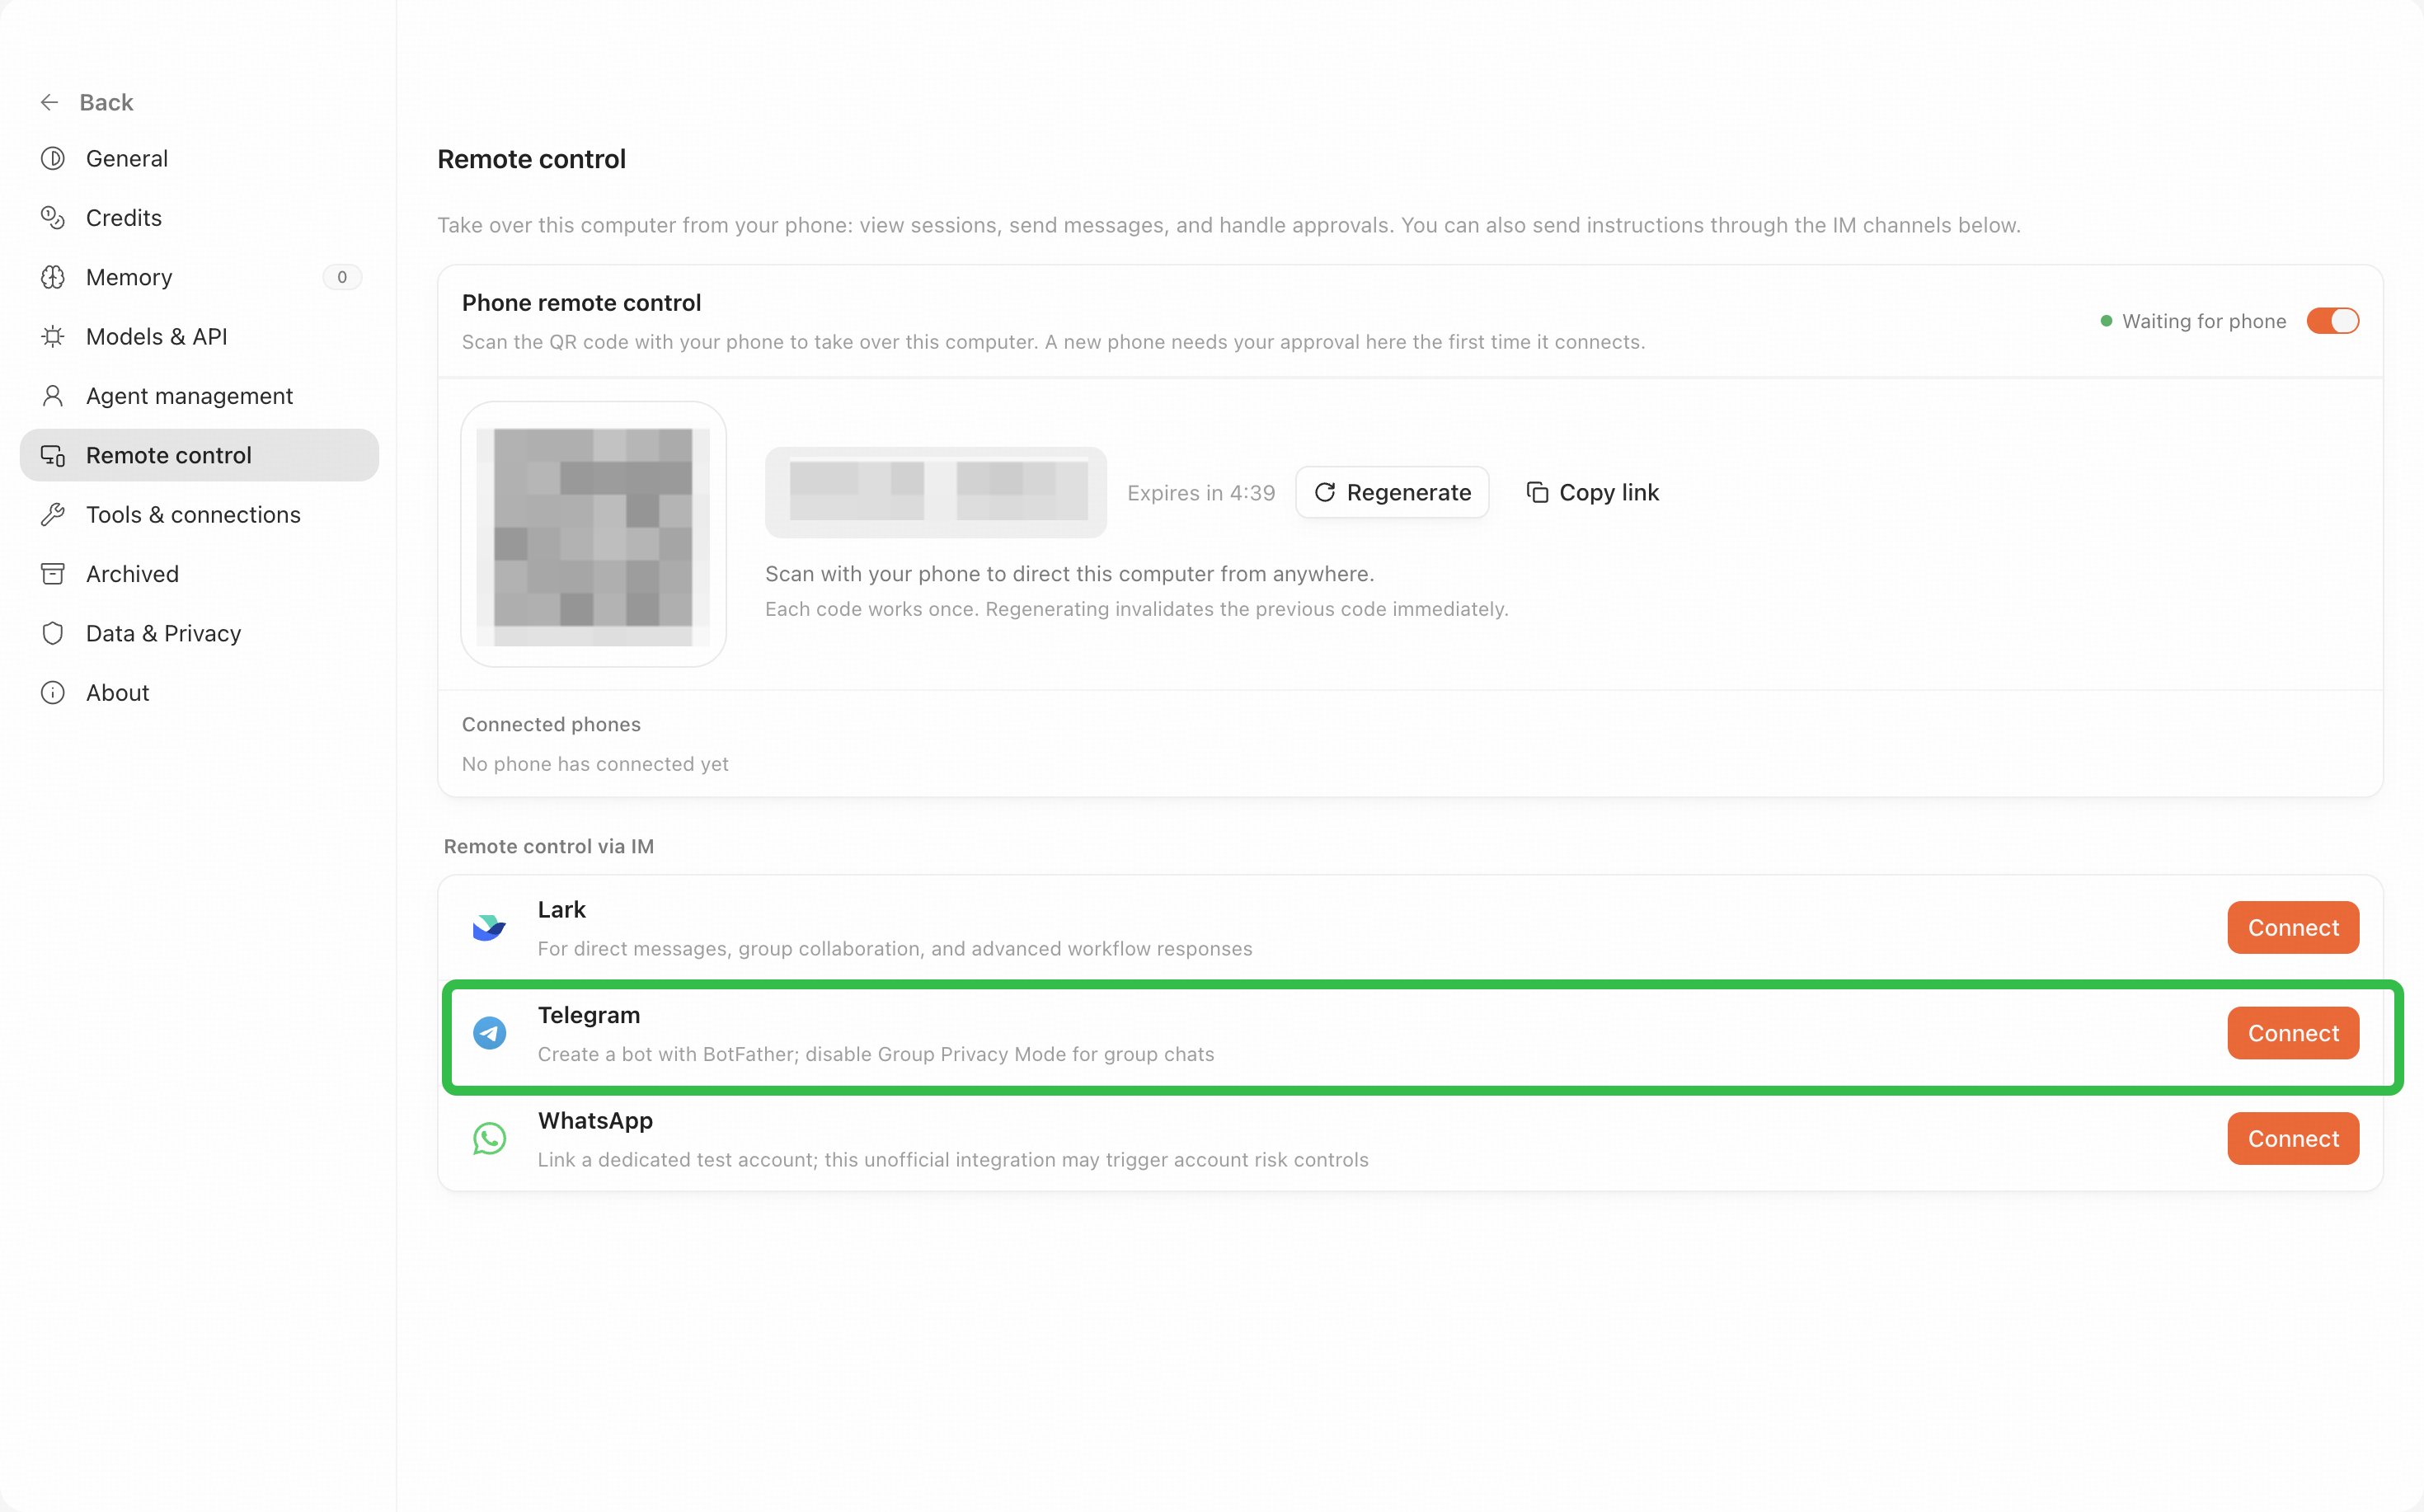
- On the home page, click Set up remote control (or open Settings and go to Remote control).
- Choose the IM platform you want to connect.
4. Set up Telegram
- In Telegram, search for @BotFather and send /newbot to create a bot. You will get a Bot Token that looks like 123456:ABC-DEF....
- In AutoClaw, go to Settings → Remote control, select Telegram, and paste the Bot Token.
- Click Save. AutoClaw uses the Token to check that the bot works. If the check fails, make sure the Token is complete and that your network can reach Telegram.
- In Telegram, send a message to the bot and confirm that it replies.
- If AutoClaw shows a pairing instruction, send exactly that message to the bot in a direct message from your Telegram account.
To receive scheduled task reminders in Telegram, bind yourself as the owner: scan the Telegram binding QR code with your phone camera (Telegram's built-in scanner cannot read it) or click Open in Telegram to bind, and send the /start link to the bot. Then send any message in that chat to finish the setup.
5. Set up WhatsApp
- In Remote control, select WhatsApp and click Show QR code.
- Scan the code with WhatsApp on your phone to link the account. If you need a new code, click Get a new QR code.
- After linking, AutoClaw shows a pairing instruction. From the linked account, send exactly that message in the chat where you want to talk to the Agent.
⚠️ WhatsApp is an unofficial integration and may trigger account risk controls. Link a dedicated test account rather than your main account.
6. Set up Lark
Choose how the bot responds
Setting | Description |
|---|---|
Respond as | Choose which Agent handles the messages this Lark bot receives. |
Option 1: Install by QR code (recommended)
- Open the Install by QR code tab.
- Choose the Agent in Respond as.
- Scan the QR code with Lark and confirm authorization on the official page.
- The bot connects automatically, usually within a few seconds.
- Return to AutoClaw and check that the status shows Connected.
Option 2: Enter credentials
If you already have a Lark app, open the Enter credentials tab, enter its App ID (starting with cli_) and App Secret, then verify and connect. The app must be created in the Lark developer console (open.larksuite.com/app).
❗ Security reminder: Bot Tokens and App Secrets are sensitive credentials. Do not paste them into chats, screenshots, or public documents. Before taking a screenshot, hide the Token, App ID, App Secret, QR code, and account identity information. If you suspect a leak, reset the credentials on the platform right away and update the configuration in AutoClaw.
7. Set up Discord
- In the Discord Developer Portal, create an application and a bot, and copy the Bot Token.
- Enable Message Content Intent for the bot. AutoClaw requests the Guilds, Guild Messages, Direct Messages, and Message Content intents.
- Invite the bot to a test server.
- In AutoClaw, go to Settings → Remote control, select Discord, paste the Bot Token, and save.
- Send the pairing message shown in AutoClaw to the bot in a direct message.
If the connection fails, check the Bot Token, your network, and Message Content Intent. If Discord cannot connect through your system proxy, configure an HTTP/HTTPS proxy.
8. Set up Slack
- In AutoClaw, select Slack and click Create App (or Copy manifest) to create and install a Slack App in your workspace. Your workspace may require administrator approval.
- Copy the Bot User OAuth Token from OAuth & Permissions after installation.
- In Basic Information, generate an App-Level Token with the
connections:writescope. - Paste both tokens into AutoClaw and click Verify and connect.
- Send the pairing command shown in AutoClaw to the bot in a direct message to bind yourself as the owner.
Tokens stay on your computer. Connect each Slack App to one AutoClaw only. Offline delivery is not guaranteed.
9. Manage a connected channel
- Settings: View or change the bot's name, the Agent it responds as, and its connection details.
- Add bot: Add more Lark bots and choose a different Agent for each.
- Disconnect: Remove the connection and its credentials. Your tasks and history are kept.
10. Verify the connection
- Confirm that the channel card shows Connected.
- In the corresponding IM app, send a test message to the bot.
- Check that the bot replies normally and that the reply comes from the expected Agent.
💡 For your first connection, we recommend binding a test Agent and verifying sending and receiving with messages that contain no sensitive information. Once it works reliably, switch to your production workflow.
More questions about connecting channels and troubleshooting are collected in the FAQ.